Vynae is now fully released and will likely not be receiving major feature updates to the CLI version. There is a GUI that is still catching up to the CLI version, but new features are not likely to be added (never say never though). This post will go through the original idea behind Vynae, as well as the challenges and process of its development. Vynae can be found here and is completely open source and available for anyone to use.
Because it was so messy and each function was essentially self-contained, I needed to do another big re-write. I had more experience with program design at this point, and I drafted something that allowed me to create more complex filtering options and reduce the overall fluff from the way I was handling text output.
Perhaps the largest difference was that I now had all of the text output handled by a single function. I was using conditionals to display things based off of the parameters used in the filter, as well as what information was available about a given process. Another change was the function structure. I had learned how to use the parameters better, and could now build in filtering based on filter parameters instead of having a separate function for each filter/combination of filters. This new design idea allowed me to expand on the offered filters, and create more complex filtering options.


In order to display the pulled process information, I needed to find a way to populate the DataGridView object. From what I found, I needed to create an array that held the information I wanted, and then I could put that into the DataGridView. From there, I could pull out the Process ID from the DataGridView object and populate a secondary DataGridView for the networking information. The challenge was that nothing could be dynamically updated, e.g. the network information couldn't be populated when a process was selected. I needed to create buttons for everything to work and populate correctly. Because of this, I created a secondary function to return an array that held the network information so it could be loaded into the DataGridView. To do this, I needed to convert a lot of the form initialization variables into global variables, so they could be changed when the secondary functions were called.
Ultimately, it ended up being a simple array solution and some clearing and reloading of the DataGridView object. However, arriving at this solution took a good amount of time as I kept playing around with various other methods of doing it.

Origin and CLI version
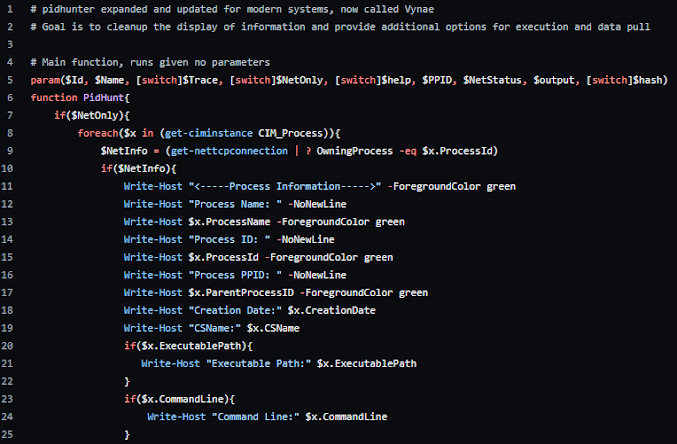
Vynae has a somewhat interesting history. It started as a small script that traced Parent Process IDs and pulled network information from processes. I needed a solution that was quick and dirty to help me document a CobaltStrike beacon I had found during the CCDC regional competition. Originally, Vynae looked something like this and was called PIDHUNTER, because it only found information on given processes. 
After the competition, I wrote it into something a little nicer than the mess I used in the competition, and I created the version above. It *worked* but didn't quite do what I wanted. I didn't know anything about PowerShell at the time, and I abandoned the project for several months.
Eventually, I was called back to work on Vynae when I came across it in my project files. I re-wrote the entire thing and added a lot of features I felt were needed. At this point, I changed the name from PIDHUNTER to Vynae and started to seriously start developing a tool I felt I could actually use.
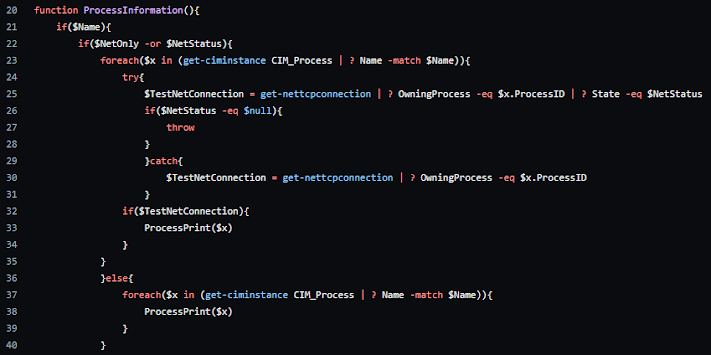
At this point, Vynae had network filtering, service scanning, Parent ID and Process Spawn tracing, and a hash comparison function. It was still very messy, and I spent a lot of lines on text formatting. It ended up with around 1000 lines of code for what could reasonably have been done in about 200. I knew that this was a problem, and I knew that the design didn't lend itself to expansion.
This is the current build of Vynae, and it offers the default scanning methods used in all Vynae builds, but it expanded the defaults and brought more information to it. A default scan now includes Process Name, ID, Parent ID, Parent Process Path, Creation Date, Time Active, Executable Path, and Command Line Options. Through the available parameters, Vynae can also display Process Hash information and Network Connection information. The current filters available are based on Network Connection status and type, time information such as filtering by day or by time active, tracing Process Spawns, Parent Processes, and filtering by hash. There are additional formatting options available as well, to make the output more readable or to include more information.
The current version of Vynae also has limited module support. Modules were designed as a way to expand the abilities of Vynae without compromising the original concept of it being a process and service scanner. The current modules are in various states of completion, but allow Vynae to create scheduled tasks to improve device security. They primarily target the CCDC environment but can be deployed in a normal network as well. BlackWall creates a triggered task on a failed remote logon. It will ban the address used, and deny it from accessing the server. RunKeys hashes the registry keys and temp files and compares them to a list of known-malicious hashes. Integrity, which is the most complete of the modules, will run when the device turns on, or the module is run for the first time. It creates a list of all the running processes and then compares them to the current processes every X minutes. It flags the differences and notifies users of processes that have been exited or started.
Vynae CLI Examples
Vynae Default Scan
Vynae scan for chrome processes with active network connections with md5 hashes displayed
Vynae scan for running services with network connections
Vynae GUI
Recently, I decided to create a GUI version of Vynae. The main issue with that was that Vynae was & is 100% PowerShell. I wanted to keep Vynae fully PowerShell, and I knew a little bit about using Windows forms in PowerShell, although I had never actually worked with them before. Turns out, that because PowerShell is a part of the .Net framework, you have full access to the same toolset used in C# and the other supported languages. The big downside is that you can't (maybe? I didn't actually check) use Visual Studio's nice form designer with PowerShell. I had to manually align and place every single label and button. It was certainly a learning experience.
 |
| Windows form creation in PowerShell |
 |
| Filter function |
 | |
|
Another issue with the GUI version was that the CLI version relied a lot on passing information between functions. Filtering functions, output formatting functions, information formatting functions, etc... The GUI version couldn't support this level of back and forth, or at least, I didn't want to try and work it into the GUI version. I needed to create a self-contained loop to trace a Process ID back to the origin point without using the solution I had created in the CLI version.
This is ultimately what the GUI edition ended up looking like, and it supports filtering via name, ID, and Parent ID. It also supports Process Spawn tracing and Parent ID tracing.
Closing Notes
Vynae was the largest project I've ever completed, and it has finally hit a point where I believe all of the features that make sense for it are included. I've dabbled with hooking it into Sysinternals' ProcDump to enable Vynae to get memory dumps and read through them. However, I don't have a timeline for that feature, and it may never happen. Either way, Vynae is officially finished and leaving the active development stage. The GUI *should* be getting an update in the next month or so, whenever I have time to clean it up a bit. But the CLI version is finished and won't be updated for a good while.
Comments
Post a Comment