
IP header formatting and finding and understanding the content of a packet

 My plan for this week was to go over and talk about IP headers and datagrams. However, while looking through some resources, I find a document that can explain it far better than I can. So instead of diving into the technical nitty-gritty of packets and headers, I'll let Burton Rosenberg of the University of Miami's Computer Science department handy article explain it. 

With my original plans for this article taken care of, I instead thought that it would be a good idea to cover how to actually examine a packet and apply this information. It is one thing to know the theory, and another entirely to apply it. With that in mind, I decided to play around with Wireshark and throw together a little demonstration depicting the process. 


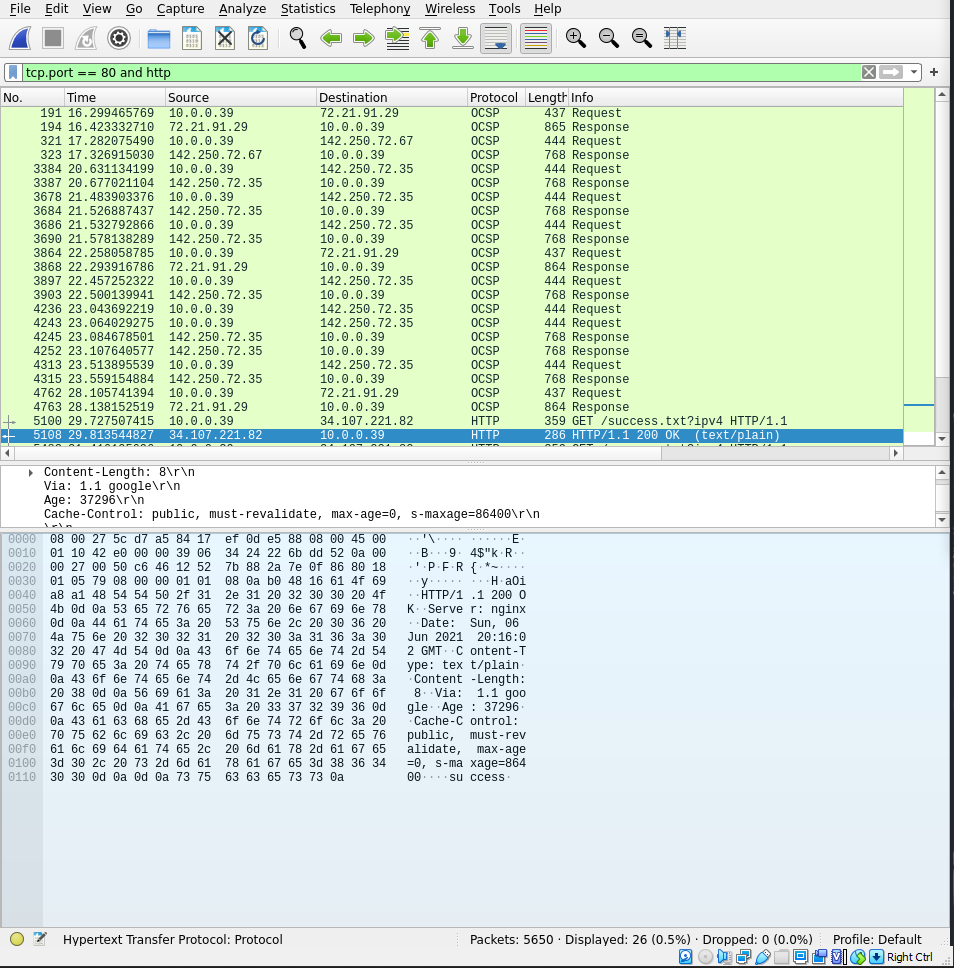
This is a Wireshark window that shows the HTTP traffic to and from my VM. To generate this information, I started Wireshark, confirmed in the capture options that it was using the correct adapter, and performed a google search. The packet that I'll be looking through is a response from one of the searches. When you initially click on it, the packet details and packet bytes viewer are populated. 


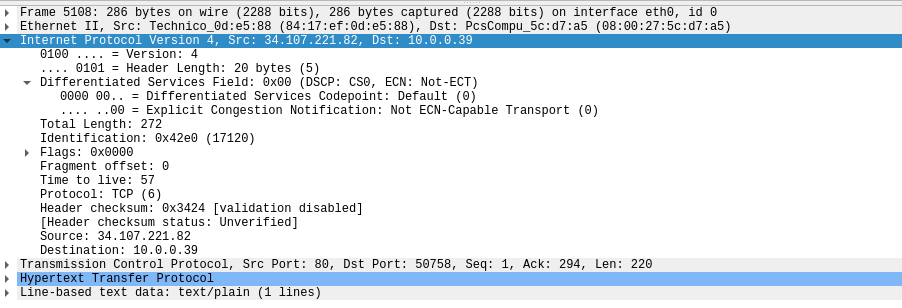
Packet Detail viewer
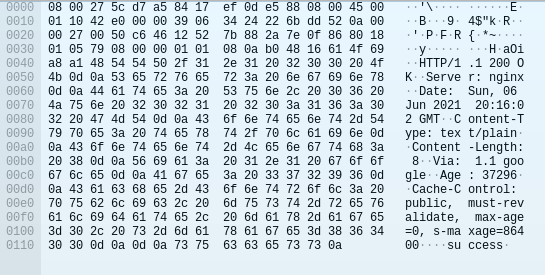
Packet Bytes viewer

While these might look confusing at first, they are easy-to-use tools that can simplify the process of extracting the IP header. In the packet detail field, simply scroll down to the IPv4 or v6 drop-down menu. After opening the menu, you will see each of the fields within the IP segment of the packet as their own submenus. Clicking on any of these will also highlight the corresponding hex values in the packet bytes viewer.             


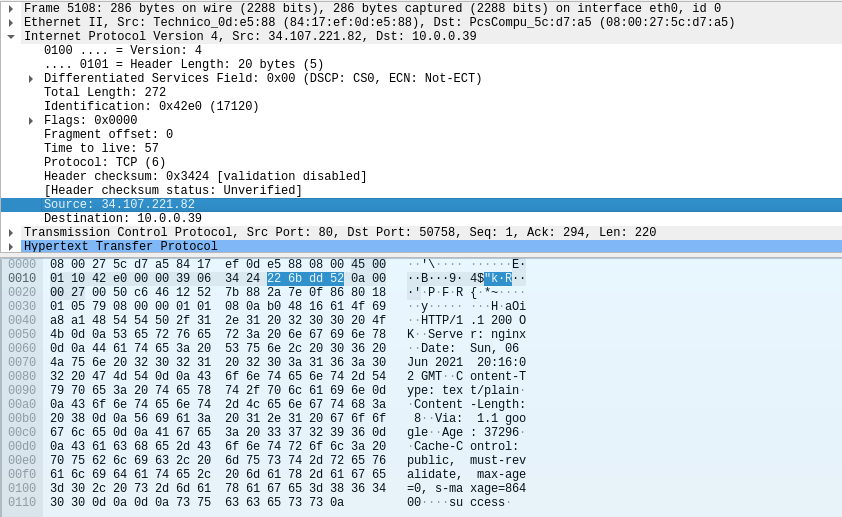
In this image, I have selected the source field in the packet details viewer and the actual bytes have also been highlighted below. Wireshark parses through all of the information for us and provides an easy-to-read format in the packet details viewer. By utilizing Wireshark's built-in tools, it is incredibly easy to find and process IP information and packets. 

Comments

Popular posts from this blog

Using PGPy to encrypt and decrypt files and messages

 PGPy is a library for python that enables the creation, storage, and encryption/decryption of PGP keys and files in python. Recently, in a small project to reacquaint myself with python, I used PGPy for key generation and encryption and decryption. That project can be found in my github at  https://github.com/lpowell . The goal of the project was to use command-line switches to control the program, and to provide basic encryption and decryption capabilities, along with rot13 and base64 encoding.  First, to load in a key use key, _ = pgpy.PGPKey.from_file(keyfilename) . This loads the key from either a binary or ASCII armored file. You can swap out .from_file for .from_blob , if you plan on using a key stored in a string or bytes object rather than a file. In my example code, I pull the key from a file, as I found it to be the simpler method.  Next, you'll need to open a file or create a string or bytes object that contains the message you wish to encrypt. We'll cal...

Huntress CTF Challenge Writeups: HumanTwo: MoveIt IoC Analysis Challenge

HumanTwo: MoveIT IoC Analysis Challenge The HumanTwo challenge is a malware CTF from the 2023 Huntress CTF. This write-up walks through the initial discovery, de-obfuscation, and solving of the challenge. The actual flag will be redacted from the document, but interested parties should be able to follow the steps and derive it themselves. While the write-up assumes a base level of knowledge regarding the command line and Linux. Most tools and commands will be accompanied by short explanations. Step 1: Initial Analysis To start off, we are given an archive with 1000 files named after their file hash. The hint we are given is that there are minor differences between each file. We also know that HumanTwo relates to the MoveIT vulnerability and exploit. The easy way to progress is to look up articles that tell you about the vulnerability and what stands out in each exploit script. However, I didn’t do that, so I’ll put the process I followed down instead. First, because I knew that...

Huntress CTF Challenge Writeups: VeeBeeeee & Fetch

  VeeBeeeee: A Microsoft Script Forensics Challenge VeeBeeeee starts with an extensionless file. When attempting to open this file, we get a bunch of random junk. I used PowerShell to display the content of the file and then dropped the output into CyberChef to decode it. Using the “Magic” function on CyberChef told me that it was a Microsoft Script, and CyberChef applied the Microsoft Script Decoder function to the text blob. Copy/Pasting the cleartext code into VSCode lets us use the find and replace function to get rid of some of this junk data. While going through the script and getting rid of the tacked-on strings and characters, we can see that there is an array being built called Request. If we follow the link in this array, we get to a Pastebin file with the flag.   Fetch: A Prefetch and WIM File Analysis Challenge Fetch provided an unknown file with no extension. Like previous challenges, we can use the “file” command to determine the file type. Using ...